PicsArt Editing Tutorial | How to use PicsArt Mobile Application
PicsArt is a really vast photo editing application, where we can edit our pictures in very creative ways. We can edit pictures, be it landscape or portrait, we can create collages, create posters, interesting stories, and what not! PicsArt is ultimately an all in one application for all these stuff.
Using PicsArt, we can create some really beautiful yet innovative pictures using Magic Effects. We can also create interesting thumbnails for YouTube videos, attractive profile pictures for Instagram, and a lot. Let's dive deep into a few of these features provided by PicsArt, and how we can use them effectively.
1) Dispersion:
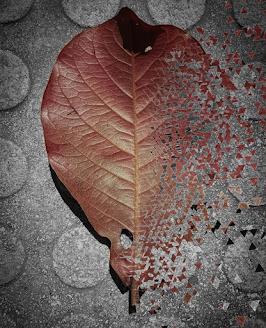
You can apply dispersion effect to your pictures very easily. There are further filters like stretch, size, direction, fade & blendmode. We can adjust each one of these accordig to our convenience. Blendmode contains various effects which will enhance this filter more effectively.
2) Other Tools:
Here, with PicsArt, we can make use of various tools similar to that of Snapseed. We can crop normally. Aditionally, there are options to free crop as well as Shape crop which are quite interesting. We can shift selected area, which is similar to head pose in Snapseed, but here we have freedom to play with anything! We can also resize the image, adjust perspective, and make use of several more interesting tools.
3) Effects:
Under the effects tab, we can see a variety of effects, which are categorised according to several types. Each one is so unique, and when used at right place, it can definitely make our picture look magical and extraordinary.
4) Beautify:
This is the best tool for portrait images. Though some of tools in this feature are only for paid members, it's free version too has sufficient effects which can turn portrait images look their best. Some of these are Face Fix, Red Eye Correction, Teeth whitening, Hair Color, etc.
5) Sticker:
We can search and add various stickers prepared by PicsArt community to our pictures. We can even edit them and make them look real. We can remove specific portion from them to make it more realistic. If you have a creative mind, there is a lot you can do with PicsArt stickers. So, keep experimenting! Below is a demo video on how to use Stickers.
6) Cutout:
This is an amazing tool through which we can create our own stickers out of our pictures. PicsArt automatically detects our subject in order to create sticker. We can make changes to it according to our necessity. This feature is quite helpful for attractive thumbnails to YouTube videos, where you can use stickers of your own subject.
7) Add Photo:
This feature is same as Double Exposure in Snapseed, where we can combine two or more pictures and make it look one.
8) Mask:
Using Mask feature, we can insert various layers such as rain, dust, etc. on our picture. These turn out to be really beautiful. There are various options from which we can select.
9) Lens Flare:
This feature provides some unique light effects which we can apply to our pictures. These are mostly similar to the ones provided by lens distortions.
10) Brushes:
Using these, we can write, draw, apply patterns on our pictures. We can adjust the size and opacity of the brush.
So, these were some of the unique features of PicsArt Application. Using a combination of these, we can create innovative and excellent pictures. Just brush up your creativity and experiment with the available tools. It is really fun using PicsArt!
Don't forget to follow me on Instagram for more such pictures. Here's the link :
Subscribe to my YouTube channel for more such editing tutorials.


Comments
Post a Comment